
I haven’t posted regularly due to some great news found out shortly after we bought a house…I’m expecting! With that news I’ve not only been working on getting the house and nursery together, but also a baby quilt. If you’ve ever quilted, you know that it can be a time consuming process, even if on paper it seems like it’s so small it shouldn’t take any time at all!
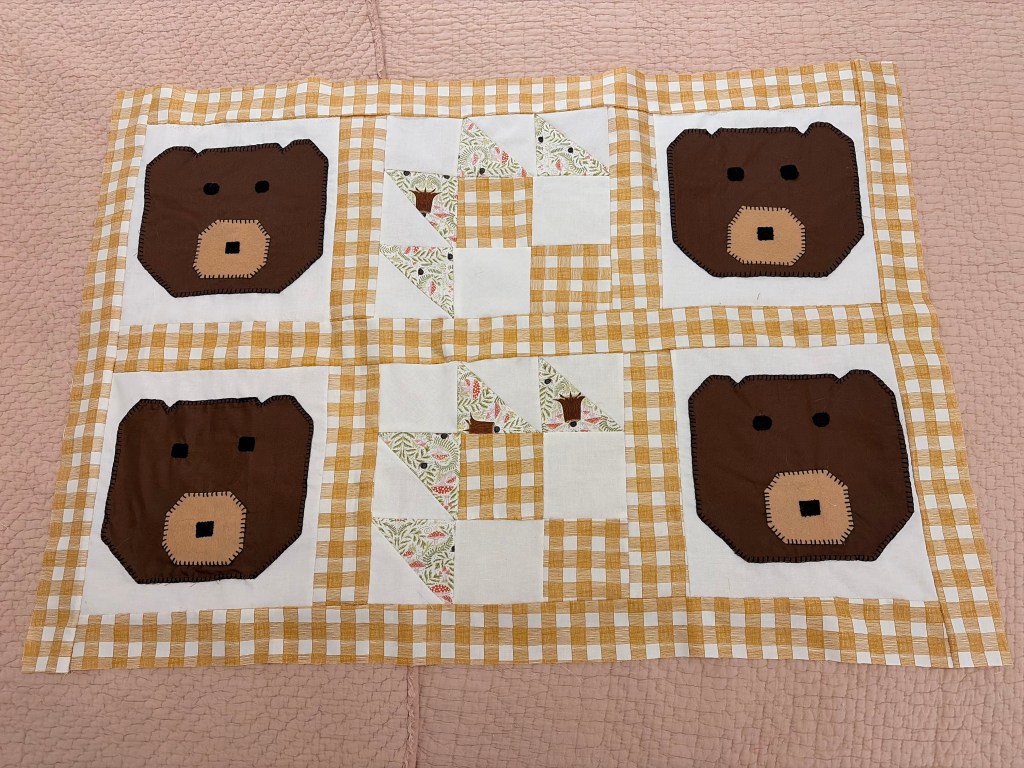
I’ve decided to do a woodland theme for the nursery, with some feminine touches as it is supposed to be a girl. I saw adorable baby quilts with bears as the main block, and decided to add bear paw patchwork blocks for visual interest. I made my own pattern and I want to go through the process on creating your own so you too can make your own. I’m not an expert by any means, and this is a very simple, almost pixel-like pattern, but we all have to start somewhere!
Supplies:
- Grid pattern (whether it’s a cutting mat like mine, grid paper, etc)
- paper, pencil, scissors
First, decide how big you would like your final blanket to be. I wanted a baby quilt, which are usually around 30 x 30 according to a quick online search. A 10 x10 block would be the easiest to build that size blanket. A quick reminder to always account for a seam allowance in your pattern. I cut out a test 10 x 10 block from paper and tape to make the pattern for the bear.
Now, the brown for the bears came from my grandmother’s stash and so I had to work around the limited amount of material. To figure out the pattern for the bear, I got out my grid cutting mat and paper block. You want some negative space around the bear, and I felt a bear 5 squares (or inches) high was the best look. With another piece of paper sketch out your bear. The bear is essentially a square with some notches cut out for the ears and bottom of the face. Using the grid, the ears were about 1 inch, and the notch half a inch. The bottom of the face angle was 3 squares, cutting them in half. Draw out the complete pattern. It took some fits and starts, but I eventually made a bear pattern I liked. The grid was a great way to help visualize the next step. I eyeballed the snout and eyeballs from scrap felt, cutting them down until I liked the size.
Below is the finished quilt top. I might add a little bow to the bears, since we found out the gender since I started this project, but overall I’m pleased with how it came out. Once you can make your own patterns, the world is your oyster. In fact, I don’t remember my grandmother ever buying patterns, except for maybe my treasured Dutch boy and girl quilt she made me. If you are into quilting at all, browse the interesting and beautiful art quilts that are displayed in museums. It shows how far you can go if you keep at this skill.