

Halloween is my favorite holiday, and so come late July I am already flooded with ads. I saw THE cutest ghost pillow on a popular home goods website, however I couldn’t justify the $80 price tag. So I decided to make my own.
Materials:
- White/cream fleece-type fabric (Joanns white sherpa @ $3.50 total cost for half a yard)
- Black felt (.30 cents also Joanns)
- Round 12 inch pillow form (Amazon $13)
- scissors, matching thread, and pins
Directions:
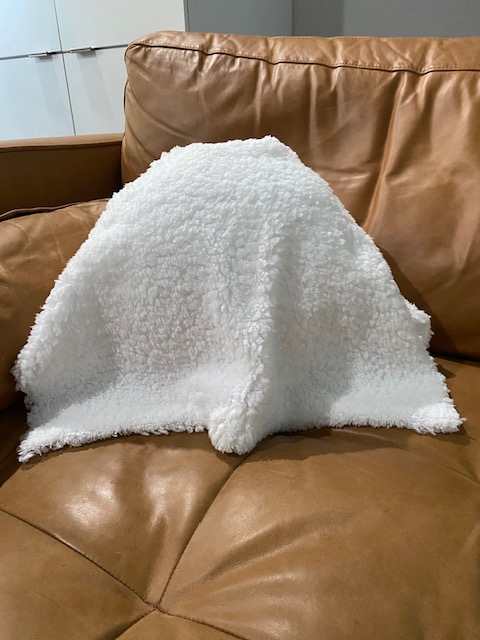
- Lay fabric out on a flat surface fabric right side up. Place pillow form underneath the fabric centered so an equal amount of fabric falls on either side. Ensure there is some overhang in the front and back to allow for some pooling at the bottom as well as to allow for a seam allowance.
- After ensuring there is enough overhang, cut any excess fabric in the back. You should now have a long rectangle.
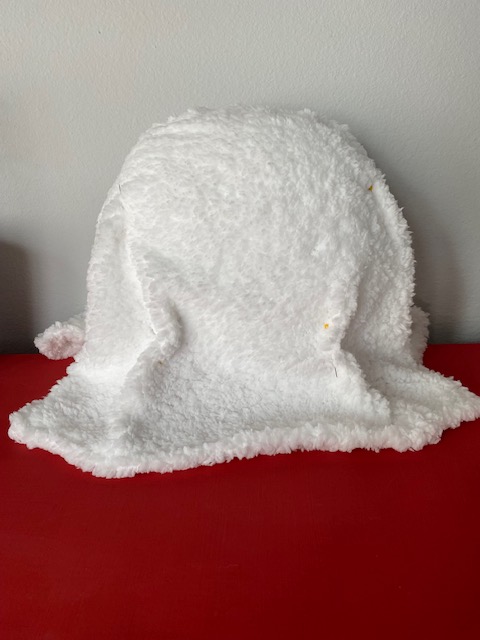
- Next, grab your pillow form. Turn the fabric the wrong side up and folded in half. Place the pillow form in the middle close to the edge of the folded fabric. Pin close to where the form ends, creating two triangles on the upper hand corners of your fabric. If needed, keep pinning downwards at an angle until you clearly see the triangles on both ends of the fabric. Essentially, we are creating a half circle that will form the top head of our ghostie.
- Sew closed both triangles, leaving the edges open.
- Turn right side out.
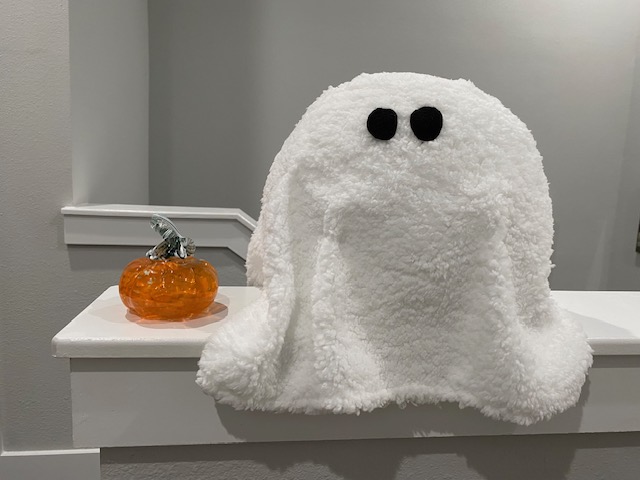
- Cut two ghost eyes from your black fabric. Place form inside your ghost to ensure the eyes are placed where you want them. The original had the eyes close together so I copied it. Pin in place, take out the form, and attach the eyes with matching thread. I didn’t take much time on this, a quick few stitches at the top and bottom, although a blanket stitch with embroidery thread would also look great, I think.
- If you are hemming your ghost, go ahead and fold under the fabric and sew along all the edges. I decided to hem mine because the original looked like it was hemmed, as well as the fact my fabric was shedding some fuzzies.
- Place form inside the ghost, pulling down tight. I did not cut off the excess fabric from sewing the triangles, but rather pushed them so they are on the back side of the ghost.
- Attach the fabric to the form by sewing a few stitches on either side of the top, as well as on either side where the fabric opens up.
- Place your ghost “sitting up” so you can create the drapes. I used an action figure to keep him upright while I did this. Pin the fabric to create a couple of folds, then make a few stitches on each of them with matching thread.
And your done! In 10 easy steps you have your own ghost, and in my case I got the materials for less than 20 bucks. These instructions work even if the form you buy is bigger or smaller than mine, and there is so much room for customization. The fleece fabric is very forgiving if your stitches aren’t super straight, and so is a great beginner or kid-friendly project. Please see below if you are more of a visual learner.
ETA- They have since expanded their line to include a Gus that holds a small pumpkin, and a girl ghost. You can make your own or purchase a small felt pumpkin and attach it to your ghost. Search “small boucle pumpkin” and you’ll find many items that look like the original.